DIY Donuts


Hey, everyone! I saw this great tutorial on how to make donuts and I had to share! Now be warned, this can take up to 8 hours of your time, so make it a day long activity with friends and family! I was able to get my sister Camila to help me with this which made it much easier for me to take photos since she did all he hard work! 


what you need...
4 cups all-purpose flour
2 teaspoons baking powder
1/4 teaspoon salt
3/4 cup sugar 
2/3 cup sour cream
1/3 cup buttermilk
3 eggs
1 teaspoon vanilla extract
6-8 cups vegetable/canola oil

thermometer for monitoring oil temperature
large pot or deep fryer
donut cutter (optional)

///

1. In a large bowl, sift together the four, baking powder and salt.
2. In another bowl, mix the sugar, buttermilk, and sour cream together
3. Mix the eggs and vanilla until combined.
4. Slowly add the flour mixture to the wet mixture. After awhile the wooden spoon wasn't working for me so I used my hands. If you do that make sure to put flour on your hands first because the dough is very sticky.
5. Refrigerate the dough for 2+ hours.


6. On a floured surface, knead the dough for about 2 minutes and refrigerate for another hour.


7. Now, roll out the dough to a 1/2 inch thickness.


8. Go ahead and cut out as many donuts as you can with the donut cutter (note that we did not use a donut cutter but instead we used a coffee cup and the cap to some sprinkles to cut out the shapes)


9. Usually, with a donut cutter you will cut out the middle but because we used a coffee cup we had to use the cap to some sprinkles to cut out the middle.


10. Use up all the dough, at the end we rolled some dough up into little balls to act like donut holes.
Leave them in the refrigerator until the oil is hot.


11. Pour the oil into the pot to reach a depth of about 4 inches (unless you have a deep fryer the I don't know what you're supposed to  do) and heat it up until it reaches 375° F.
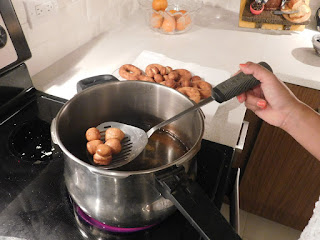
12. Gently place 2-3 donuts into the oil at a time, let it fry until golden brown then turn it over with a slotted spoon. The second side will take less time to fry.


13. Once removed from the oil, place the donuts on a paper towel to dry.

Now it's time to decorate!!


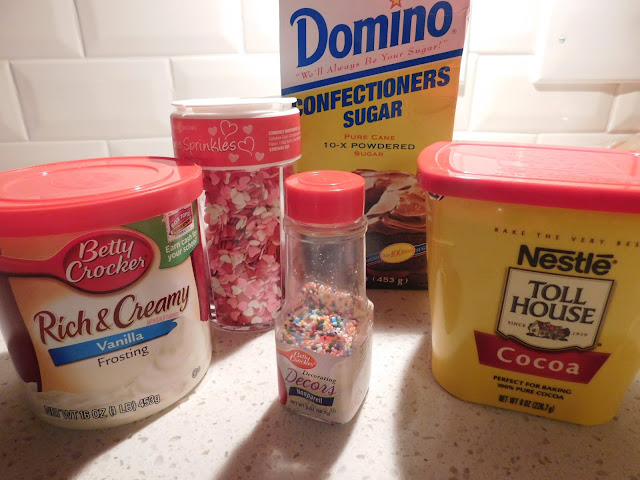
Powdered Donuts: put some confectioners sugar in bowl, dunk the donuts into it

Glazed Donuts: add 1 cup of confectioners sugar, 3 teaspoons of milk, and 1/2 teaspoon of vanilla to a bowl and mix, dunk the donuts into it
if you want, mix in a teaspoon of cocoa powder to make chocolate glaze
Add sprinkles!

Frosted Donuts: Cover the donuts in frosting
Add sprinkles!


Hope you go out and make these donuts too! The past year has been lots of fun and I can't wait for you to see what other fun projects I have in mind!

DIY Faux Fur Pillow


Hi everyone! I'm still slowly adding things to my room and eventually I'll do a room reveal, but for now I will show you how I made this faux fur throw pillow. I did not sew at all for this project and I finished very quickly! Above, I have it on my bed, but I then gave it to my sister since she wanted more pillows on her bed. 
(Check back next week for a special 1st Birthday Post! I had lots of fun making what i'll show you and you get to meet my sister!)


what you need...
pillow form (whatever size you want)
1/2 yd-1 yd of fur
glue gun
pins
scissors


1. Measure out how much fabric you need to fit perfectly over your pillow and cut.
You should have one long piece.


2. Fold the fur inside and pin around the edges, leave a gap big enough for you to squeeze the small side of the pillow into.
3. Remove a pin and add hot glue directly onto the fur, continue all the way around (except for the gap) and make sure everything is sticking down well.


4. Turn it right side out and carefully add the pillow form. Fold the edges of the opening in and glue it down. Make sure you didn't miss any spots (I had a few small openings here and there), 
and you're done!


DON'T FORGET this Sunday, September 18th is the one year anniversary of Threadedbobbins! I hope you'll come by to see what I made and share with your friends!

Back to School Pencil Pouch


Hey! So, today I am not doing a regular tutorial. I wanted to make my own pencil pouch for school but I did not know how to sew on a zipper. Thus, I went to Pinterest, since Pinterest solves all of life craft problems, and I came across See Kate Sew's wonderful tutorial. It was super easy to follow and made total sense! If I tried to explain to you how to do it I would not only confuse you but I would also confuse my self! So, go over to her blog and read her tutorial to make one of these pencil pouches!


DIY Magazine Bowl


Hey! So, I've been wanting to make some sort of bowl for awhile and I remembered that I had a stack of Time magazines that my sister gave me for whatever. The first thing that I could think of was this magazine bowl I made 2 years go in art class, now I've made it again. It's very easy to make, it's just very time consuming (naturally I started watching H2O so that I wouldn't get bored).


1. Tear one page in half.


2. Take one half and make a crease in the middle. Fold the edge in, then fold it in again.


3. Do the same for the other side, fold it in half.


4. Continue until you feel like you have enough 
(what I have pictured isn't enough, I used 3 Time magazines.)


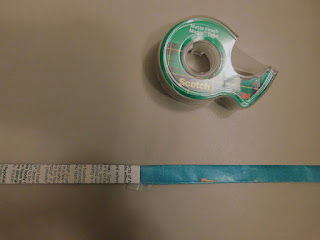
5. Tape together all the ends.


6. Start to roll it up, roll it VERY tightly.
7. Your roll will keep getting bigger and bigger, make sure it is TIGHT.

8. One you're done, tape the end down. Start forming it into the shape of a bowl. When you like how it looks use a sponge/paintbrush to apply glue all over it so it will stay in place.

DIY Yarn Hanging


Hey! As I have said way too many times, I moved! My room went from empty to boring, but now with furniture after about two weeks of living here. I decided that I needed stuff on the walls.
After scrolling through pinterest for hours on end I decided to do one of those woven wall hangings, then I saw how long that would take. I was NOT about to do that, so I made this instead! 
This is much easier and I think if you do it on a stick instead of a dowel it will look ALOT cooler!


what you need...
7/8X36 dowel or a stick
bulky yarn
hook


1. Lay out the yarn and cut it a little longer than where you want it.


2. Bring the top part of it underneath the dowel and pull the ends through the loop.


3. Continue until you are done.


4. Hang it up somewhere so that you can cut the ends in the way you want.
(Mine is sitting in between my tripods)


5. Now just hang it up with the hook of your choice ( I used a command hook).
and you're done!